The Nanit Wall Mount offers a secure and optimal way to install your baby monitor, ensuring a clear view of your child while maintaining safety and peace of mind.
Overview of Nanit Wall Mount
The Nanit Wall Mount is a sleek and sturdy solution designed to provide a clear, bird’s-eye view of your baby’s crib. It ensures the camera is positioned optimally, allowing the smart algorithm to track sleep patterns and movements effectively. The mount is easy to install and adjust, making it a reliable choice for parents seeking peace of mind. Proper installation is essential to ensure the camera captures the entire crib area and operates seamlessly. The wall mount is designed to be durable, supporting the weight of the Nanit Pro camera securely. By following the installation guide, you can achieve a stable setup that enhances your baby’s safety and your monitoring experience.
Importance of Proper Installation
Importance of Proper Installation
Proper installation of the Nanit Wall Mount is crucial for ensuring your baby’s safety and the optimal performance of the camera. A well-installed mount guarantees a clear, unobstructed view of your child, allowing you to monitor their sleep and movements effectively. Incorrect installation can lead to poor camera alignment, potentially missing critical moments or compromising the device’s functionality. Additionally, proper installation ensures the mount’s stability, preventing accidents or damage to the camera. Following the guidelines also allows the smart algorithm to work accurately, providing valuable insights into your baby’s sleep patterns. By adhering to the instructions, you can achieve a secure setup that offers peace of mind and reliable monitoring.
Preparation
Begin by unpacking and checking all components, ensuring everything is included and undamaged. Gather necessary tools and materials for a smooth installation process.
Unpacking and Checking Components
When you receive your Nanit Wall Mount, carefully unpack all items from the box. Ensure the package includes the wall mount, mounting template, screws, anchors, and the camera. Inspect each component for damage or defects; If any part is missing or damaged, contact customer support immediately. The mounting template is crucial for proper alignment, so verify it is included and intact. Familiarize yourself with each piece to understand its purpose during installation. This step ensures you have everything needed for a successful setup; Take your time to organize the components to avoid losing small parts like screws or anchors. Proper preparation now will streamline the installation process and prevent delays later.
Tools and Materials Needed
Tools and Materials Needed
To successfully install the Nanit Wall Mount, gather the necessary tools and materials. You will need a drill with drill bits, a level to ensure straight alignment, and a screwdriver for securing screws. A measuring tape and pencil are essential for marking the wall accurately. The wall anchors and screws provided with the mount are specifically designed for the installation. Additionally, a stud finder can be helpful to locate wall studs for added stability. Make sure all tools are within reach to streamline the process; Having a ladder or step stool is also necessary for safe access to the installation area. Ensure the area is clear of clutter to avoid accidents and ensure precise placement of the mount.
Safety Considerations
Safety Considerations
Ensure a safe installation by following key precautions. Secure the Nanit Wall Mount firmly to prevent the camera from tipping or falling, protecting your baby from potential hazards. Keep the power cord out of reach to avoid accidental tripping or strangulation risks. Use the provided mounting template to ensure proper alignment and stability. Always turn off power when handling electrical components to prevent shocks or injuries. Maintain a clean workspace to avoid slipping or tripping during installation. Follow all manufacturer guidelines to ensure the setup meets safety standards. Regularly inspect the mount and camera for any signs of wear or damage, addressing issues promptly to maintain a secure environment for your child;
Choosing the Right Location
Position the Nanit Wall Mount 6 feet above the crib, centered on the wall, to ensure an optimal view and effective smart features operation.
Positioning the Camera Above the Crib
The Nanit camera should be mounted 6 feet above the crib to ensure optimal coverage and safety. This height prevents tampering and provides a clear, unobstructed view. Use the mounting template to center the camera directly above the crib, aligning it with the crib’s midpoint for comprehensive visibility. Proper positioning ensures the camera’s smart features, like motion tracking and night vision, function effectively. After installation, check the camera’s angle to confirm it captures the entire crib area. Adjust as needed to achieve the best view. Always follow the manufacturer’s guidelines for installation to ensure your baby’s safety and the camera’s proper operation.
Using the Mounting Template
The mounting template is a crucial tool for ensuring accurate and proper installation of the Nanit Wall Mount. Place the template on the wall above the crib, aligning it with the center mark to guarantee symmetry. Use a pencil to mark the screw holes through the template’s cutouts. Remove the template and drill into the marked spots. This step ensures the mount is securely and correctly positioned. The template helps avoid errors and guarantees the camera’s smart features, such as motion tracking and night vision, work effectively. Follow the template’s guide carefully to achieve a precise installation and ensure your baby’s safety and the camera’s optimal performance.

Installation Steps
Drill into the wall, attach the mount, secure the camera, and connect the power adapter. Follow the template for precise alignment and a stable setup.
Drilling into the Wall
Begin by locating the wall studs to ensure a stable installation. Use the provided mounting template to mark the drill points accurately. Drill pilot holes using a screwdriver or power drill, then insert the wall anchors. Ensure the holes are level and aligned with the template to maintain the correct positioning for the Nanit Wall Mount. Avoid drilling into electrical wires or plumbing by checking the wall’s layout beforehand. If unsure, consult a professional for assistance. Proper drilling is essential to prevent damage and ensure the mount holds securely. Follow the manufacturer’s instructions for the recommended drill bit size and depth to achieve a safe and durable installation.
Attaching the Wall Mount
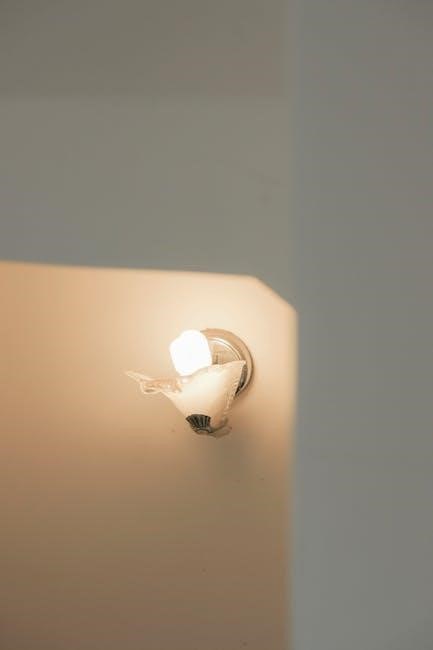
Align the Nanit Wall Mount with the pre-drilled holes, ensuring it is level and properly positioned. Secure the mount by screwing it into the wall anchors, tightening firmly but avoiding overtightening. Double-check the alignment using the provided template to ensure accuracy. Once attached, verify that the mount is stable and level. Make sure all screws are tightened evenly to prevent wobbling. The wall mount should now be ready to hold the camera securely. Ensure the mount is flush against the wall for optimal performance and safety. Proper attachment is crucial for the camera to function correctly and provide a clear view of your baby’s sleep area.
Securing the Camera
Once the wall mount is installed, carefully attach the Nanit camera by aligning it with the mounting bracket. Snap the camera into place until you hear a click, ensuring it is securely locked. Double-check that the camera is firmly attached and cannot be easily dislodged. Adjust the camera’s position if necessary to achieve the optimal viewing angle. Make sure the power adapter is properly connected to both the camera and the wall outlet. Verify that the camera is stable and level, as any misalignment could affect its performance. Ensure all connections are secure to avoid any issues with the camera’s functionality. Properly securing the camera is essential for capturing a clear and uninterrupted view of your baby’s sleep area.
Connecting the Power Adapter
After securing the camera to the wall mount, locate the power adapter and plug it into a nearby electrical outlet. Ensure the outlet is not overloaded with other devices to avoid potential safety hazards. Carefully connect one end of the adapter to the camera’s power port and the other to the outlet. Verify that the adapter is fully inserted into both the camera and the outlet to ensure proper power supply. Once connected, check that the camera powers on and all features, such as night vision and audio, are functioning correctly. Make sure the power cord is securely positioned to prevent accidental disconnection. Properly connecting the power adapter is crucial for ensuring uninterrupted operation of your Nanit baby monitor.
Pairing the Camera
Download the Nanit app, create an account, and follow the in-app instructions to pair your camera via Bluetooth and Wi-Fi for a seamless connection.
Downloading and Installing the Nanit App
Start by downloading the latest version of the Nanit app from the Apple App Store or Google Play Store. Once installed, open the app and create an account or log in if you already have one. Follow the in-app instructions to begin the setup process. Ensure your device has Bluetooth and Wi-Fi enabled to facilitate a smooth connection with the camera. The app will guide you through pairing your Nanit camera, allowing you to monitor your baby securely. This step is crucial for accessing all features, including live feeds, notifications, and sleep tracking. Make sure your internet connection is stable for optimal performance.
Pairing the Camera via Bluetooth and Wi-Fi
Once the Nanit app is installed, enable Bluetooth and Wi-Fi on your device. Open the app, select “Pair Camera,” and follow the in-app instructions. Ensure your camera is turned on and nearby. The app will guide you through connecting the camera to your Wi-Fi network. Select your network from the list, enter the password, and wait for confirmation. Once connected, the camera will pair with your device via Bluetooth for initial setup. Ensure your internet connection is stable for uninterrupted monitoring. If pairing fails, restart the camera and retry. A confirmation message will appear once the pairing is successful. This step ensures seamless connectivity and access to all Nanit features. If issues arise, refer to the troubleshooting section for assistance.
Adjusting the Camera
Adjusting the camera ensures an optimal view of your baby. Tilt or pan the lens as needed for the best angle. Use the mounting template to ensure proper alignment and ensure the camera is level for clear video.
Positioning for Optimal View
Positioning the camera correctly ensures a clear and comprehensive view of your baby. Place the camera above the crib, aligned with the center of the mattress. Use the mounting template to mark the wall for precise installation. The camera should be at least 6 feet above the crib to capture the entire sleep area. Adjust the tilt and pan features to focus on your baby’s face and body. Ensure the lens is level to avoid distortion. Proper positioning allows the smart algorithm to track movement and provide accurate sleep insights. This setup ensures both safety and peace of mind for parents while monitoring their child.
Ensuring Proper Alignment
Proper alignment is crucial for the camera to function effectively. Use the mounting template to ensure the wall mount is installed straight and level. Align the camera directly above the crib, centered over the mattress. Adjust the tilt and pan features to achieve a clear, unobstructed view of your baby. Double-check that the camera is level to avoid any visual distortion. Once installed, ensure the camera is securely snapped into the wall mount to prevent any movement. Proper alignment ensures the camera captures your baby’s entire sleep area and allows the smart algorithm to track movement accurately. This step is essential for both safety and optimal monitoring performance. Always verify alignment before finalizing the setup.

Testing the Setup
Check the camera feed to ensure a clear view of your baby. Verify night vision and audio functionality. Ensure the power connection is stable for uninterrupted monitoring.
Checking the Camera Feed
Once the camera is secured and powered on, open the Nanit app to view the live feed. Ensure the video is clear and free from obstruction. Check that night vision is activated in low-light conditions and that audio is functioning properly. Verify that the camera captures the entire crib area without distortion. If the feed appears blurry or off-center, adjust the camera position slightly. Ensure the power adapter is securely plugged in and that there are no loose connections. Test the feed at different times of day and in various lighting conditions to confirm consistent performance. If issues arise, refer to the troubleshooting section for guidance. Proper camera feed ensures reliable monitoring and peace of mind.
Verifying Night Vision and Audio
After installation, ensure the camera’s night vision and audio are functioning properly. Open the Nanit app to check the live feed in low-light conditions. Verify that night vision activates automatically, providing a clear view of your baby. Test the audio quality by listening for clear sound without interference. Ensure the microphone is sensitive enough to detect subtle sounds; If the audio is muffled, check for any obstructions near the camera or adjust the sensitivity settings in the app. For night vision, confirm the infrared LEDs are active and unobstructed. Adjust the camera angle if necessary to optimize both visual and audio performance. Proper functionality ensures reliable monitoring day and night.
Troubleshooting Common Issues
Common issues like camera malfunction, connectivity problems, or alignment difficulties can arise. Troubleshooting ensures optimal performance and resolves issues efficiently for a seamless monitoring experience.
Camera Not Turning On
If your Nanit camera fails to turn on, check the power adapter and ensure it is properly plugged into a functional outlet. Verify that the outlet is not controlled by a switch that might have been turned off. Additionally, inspect the power cord for any visible damage or kinks. If the issue persists, try resetting the camera by disconnecting and reconnecting it. Ensure the wall mount is securely attached, as improper installation can prevent the camera from powering on. If none of these steps resolve the issue, contact Nanit support for further assistance. Always refer to the user manual for specific troubleshooting guidelines.
Connection Problems
If you encounter connection issues with your Nanit camera, ensure your smartphone or tablet has Bluetooth and Wi-Fi enabled. Restart your device and the camera to reset the connection. Check that your internet connection is stable and that your router is functioning properly. Verify that the Nanit app is updated to the latest version, as outdated software can cause pairing problems. If issues persist, try resetting the camera by disconnecting and reconnecting it through the app. Ensure the camera is paired correctly via Bluetooth and Wi-Fi in the app settings. If problems continue, consult the Nanit app support section for additional troubleshooting steps or contact customer support.
Adjustment Difficulties
If you face challenges adjusting the Nanit camera, ensure it is securely attached to the wall mount and properly aligned with the crib. Use the mounting template to verify alignment. Gently tilt or rotate the camera to achieve the desired view. If the camera does not move smoothly, check for any obstructions or tightness in the mount. Ensure the wall mount is level and firmly fixed to the wall. If issues persist, refer to the Nanit app for guidance or consult the user manual. Adjustments should be made carefully to maintain camera stability and ensure optimal monitoring of your baby. Regularly check and tighten any loose screws to prevent movement issues.
Maintenance Tips
Regularly clean the camera lens with a soft cloth to ensure clear video quality and update the Nanit app to maintain optimal performance and security.
Cleaning the Camera Lens
Cleaning the Nanit camera lens is essential for maintaining clear video quality. Use a soft, dry microfiber cloth to gently wipe away dust, smudges, or fingerprints. Avoid harsh chemicals or abrasive materials, as they may damage the lens. For stubborn spots, lightly dampen the cloth with water, but ensure it is not soaking wet to prevent moisture damage. Regular cleaning prevents obstruction of the camera’s view, ensuring optimal performance, especially night vision. Clean the lens periodically to maintain crisp and clear footage of your baby. This simple maintenance step ensures your Nanit camera continues to provide reliable monitoring and peace of mind.
Updating Software Regularly
Regular software updates are crucial for ensuring your Nanit camera operates at its best. These updates often include feature enhancements, bug fixes, and security improvements. To update, open the Nanit app, navigate to the settings menu, and check for available updates. Follow the in-app instructions to download and install the latest version. Keeping your software up-to-date ensures optimal performance, improved functionality, and enhanced security. Regular updates also enable new features and compatibility improvements, providing a better user experience. Make it a habit to periodically check for updates to keep your Nanit system running smoothly and securely. This simple step ensures you have access to the latest advancements in baby monitoring technology.