Mounting your TV on the wall enhances your viewing experience, saves space, and adds a modern aesthetic․ This guide provides a comprehensive walkthrough for a secure and professional-looking installation, ensuring optimal setup and safety․
1․1 Benefits of Wall Mounting Your TV
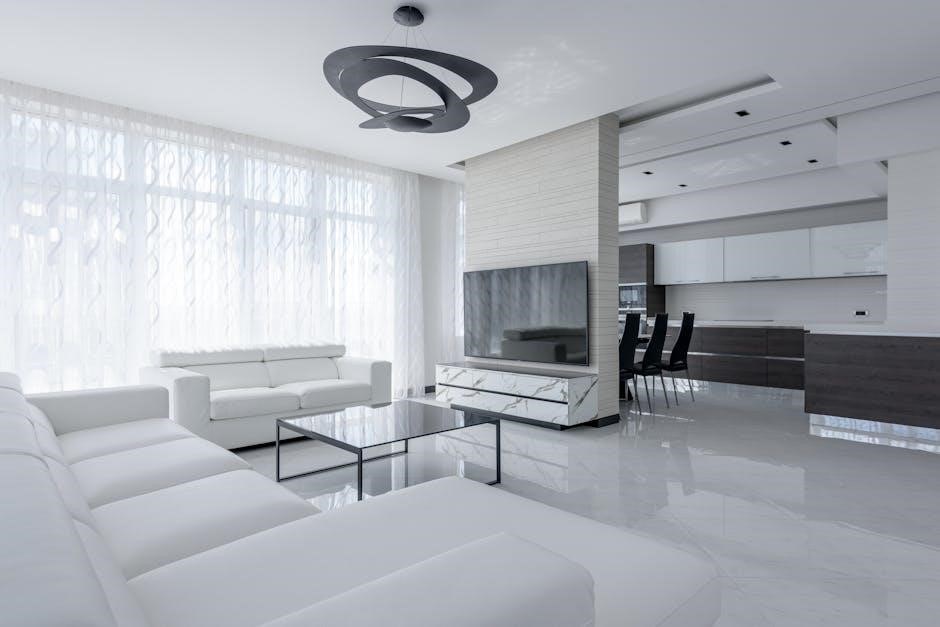
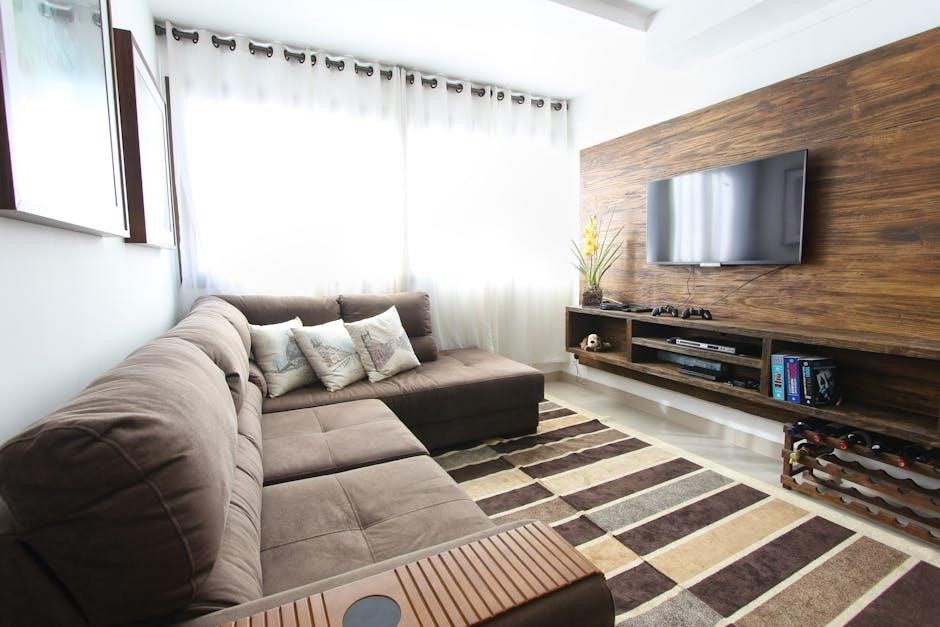
Wall mounting your TV offers numerous benefits, including space savings, a sleek modern appearance, and an enhanced viewing experience․ It reduces glare from windows and lights, providing better picture quality․ Mounted TVs are also less prone to damage from accidental knocks, making them a durable option․ Additionally, wall mounting allows for optimal height adjustment, improving comfort during extended viewing sessions; This installation method is both practical and aesthetically pleasing, making it a popular choice for homeowners seeking a professional-looking setup․
1․2 Purpose of the Guide
This guide provides a comprehensive, step-by-step approach to installing a TV wall mount securely and effectively․ It covers essential tools, safety tips, and troubleshooting to ensure a professional-looking setup; Designed for homeowners of all skill levels, the guide simplifies the process, offering clear instructions to avoid common mistakes․ Whether you’re a DIY novice or an experienced installer, this resource ensures a safe, efficient, and visually appealing installation, helping you achieve the perfect setup for your viewing pleasure․
Choosing the Right TV Wall Mount
Selecting the right TV wall mount ensures a secure and visually appealing installation․ Options include fixed, tilting, swiveling, and full-motion mounts, each offering unique benefits․ Consider VESA compatibility, weight limits, and wall type to make an informed decision for your setup․
2․1 Types of TV Mounts
There are four primary types of TV mounts: fixed, tilting, swiveling, and full-motion․ Fixed mounts keep the TV flush against the wall for a sleek look․ Tilting mounts allow vertical angle adjustments, reducing glare․ Swiveling mounts enable side-to-side movement for optimal viewing angles․ Full-motion mounts offer the most flexibility, combining tilt, swivel, and extension for precise positioning․ Each type caters to different needs, ensuring the perfect setup for any room layout and viewing preference․
2․2 Fixed Mounts
Fixed mounts are the most basic type of TV mount, designed to keep your TV flush against the wall for a sleek, low-profile appearance․ They are ideal for permanent installations where adjustments are unnecessary․ These mounts are cost-effective and space-saving, making them perfect for setups where the TV is placed at an optimal viewing height․ While they lack movement, fixed mounts provide a sturdy and stable solution for your TV installation needs․
2․3 Tilting Mounts
Tilting mounts offer slight up-and-down adjustments, making them ideal for reducing glare from lights or windows․ They are a versatile option for installations where minor angle adjustments are needed, such as above fireplaces or in rooms with varying lighting conditions․ While they don’t swivel, tilting mounts provide flexibility for optimal viewing angles without the complexity of full-motion mounts, making them a practical choice for fixed seating areas․
2․4 Swiveling Mounts
Swiveling mounts allow the TV to turn left or right, providing flexibility for viewing from different angles; They are ideal for rooms where the seating arrangement isn’t directly in front of the TV․ This type of mount is great for reducing glare from windows or lights․ Swiveling mounts are a good option for multi-viewing positions but typically don’t offer tilting adjustments․ Ensure the mount is level during installation for proper functionality and a balanced appearance․
2․5 Full-Motion Mounts
Full-motion mounts offer the greatest versatility, allowing the TV to tilt up and down, swivel left and right, and pivot for landscape or portrait orientation․ This mount is ideal for rooms with multiple seating areas or for adjusting the screen to reduce glare․ It provides maximum flexibility for optimal viewing angles․ However, full-motion mounts are generally bulkier and more expensive than other options․ They are perfect for those who want to customize their viewing experience in various settings․
Preparing for Installation
Gather tools like a cordless drill, hammer, pencil, stud finder, tape measure, and level․ Understand VESA standards for compatibility and locate wall studs for secure mounting․
3․1 Tools and Materials Needed
To ensure a successful installation, gather essential tools and materials․ You’ll need a cordless drill, hammer, pencil, stud finder, tape measure, and level․ Additional materials include toggle bolts, wall anchors, screws, and washers․ For heavier TVs, consider reinforced brackets․ A paper template can help with precise marking․ Ensure all hardware matches your TV’s VESA standards․ Having these items ready will streamline the process and prevent delays․ Proper tools and materials are crucial for a secure and professional-looking installation․
3․2 Understanding VESA Standards
Understanding VESA (Video Electronics Standards Association) standards is crucial for a compatible TV and mount setup․ VESA standards define the distance between mounting holes on the back of your TV, expressed in millimeters (e․g․, 200×200)․ Ensure your mount supports your TV’s VESA pattern to guarantee compatibility․ Check your TV’s manual or manufacturer’s website for specific measurements․ Most mounts accommodate multiple VESA standards, but verifying this prevents installation issues․ Proper alignment ensures stability and a secure fit for your TV․
3․3 Locating Wall Studs
Locating wall studs is essential for a secure TV mount installation․ Use a stud finder to identify vertical wood studs behind the drywall, typically spaced 16 inches apart․ Mark their positions with painters tape․ For hollow walls, toggle bolts can be used if studs are unavailable․ Accurate stud location ensures stability and weight support, preventing potential damage or collapse․ Always verify stud placement before drilling to avoid installation issues and ensure a safe setup for your TV․
Measuring and Marking the Wall
Measure and mark the wall accurately using a level and template to ensure proper alignment․ This step guarantees precise placement and a secure installation for your TV․
4․1 Determining the Optimal Height
Determining the optimal height for your TV ensures a comfortable viewing experience․ The center of the screen should align with the viewers’ eye level when seated․ For a 50-inch TV, the bottom should be about 29 inches above the floor․ This height balances visibility and reduces neck strain․ Consider the room layout and seating arrangement to customize the height, ensuring the TV is neither too high nor too low for optimal viewing comfort and visual appeal․
4․2 Using a Level for Accuracy
Using a level ensures your TV mount is perfectly straight, which is crucial for both safety and aesthetics․ Place a bubble level on the mounting plate or template to check horizontal and vertical alignment․ Double-check the level after drilling pilot holes and before securing the mount to the wall․ This step prevents uneven installation and guarantees a professional-looking setup․ Always verify the level’s accuracy to avoid costly mistakes and ensure your TV is securely and evenly mounted․
4․3 Creating a Template
Creating a template is a crucial step for accurate TV wall mount installation․ Trace the mounting plate onto a piece of paper, marking screw holes and edges․ Use this template to ensure proper alignment on the wall․ Place the template at the desired height, using a level to confirm it’s straight․ Mark drill holes through the template, ensuring precise placement․ This method minimizes errors and ensures a professional-looking installation․ It also helps achieve perfect alignment with your TV’s VESA standards for a secure fit․
Installing the Wall Mount
Attach the mounting plate to the wall, ensuring it’s level and aligned with the marked studs․ Drill pilot holes, then secure the plate with screws or toggle bolts․ Check the level after tightening to ensure stability․
5;1 Attaching the Mounting Plate to the Wall
Locate the wall studs using a stud finder and mark their positions․ Hold the mounting plate against the wall, ensuring it’s level․ Drill pilot holes through the plate’s holes into the wall․ Secure the plate using screws for studs or toggle bolts for hollow walls․ Tighten the screws firmly but avoid overtightening․ Double-check the level after securing the plate to ensure it’s perfectly aligned․ This step is crucial for the stability and safety of your TV installation․
5․2 Securing the Mounting Bracket to the TV
Align the mounting bracket with the VESA mounting holes on the back of your TV․ Use the provided screws and washers to secure the bracket tightly․ Avoid overtightening, as this could damage the TV․ Ensure the bracket is level and evenly attached․ Once secured, gently pull on the bracket to test its stability; This step ensures the TV is safely attached to the mounting system, preventing any movement or shifting during installation․
5․3 Tips for Heavy TVs
For heavy TVs, ensure the wall mount is rated for the TV’s weight․ Use toggle bolts or sturdy hardware to secure the mount to wall studs․ Always check the weight limit of the mount and ensure it exceeds the TV’s weight․ Consider enlisting a second person to help lift and position the TV safely․ Double-check all connections and ensure the bracket is firmly attached to both the TV and the wall․ Test stability before finalizing the installation․
5․4 Aligning the Mount Properly
Proper alignment is crucial for a secure and visually appealing installation․ Use a bubble level to ensure the mount is straight and level․ Mark the wall with pencil marks to guide drill holes, ensuring accuracy․ Double-check the alignment before tightening screws․ For heavy TVs, verify that the mount spans at least two studs for added stability․ Misalignment can lead to instability, so take your time to adjust the mount carefully before finalizing its position․
Hanging the TV on the Mount
Lift the TV carefully with assistance, ensuring it aligns with the wall mount brackets․ Secure it firmly, then test stability by gently rocking it․ Adjust as needed․
6․1 Lifting and Placing the TV Safely
Lift the TV with at least two people to ensure safety and balance․ Align the TV’s mounting brackets with the wall mount, gently lowering it into place․ Secure the TV by tightening the mounting screws evenly․ Test stability by rocking the TV slightly․ Ensure the TV is level before final tightening․ For larger TVs, consider additional support or a second pair of hands to prevent accidents․ Always follow the manufacturer’s weight and size guidelines for safe installation․
6․2 Securing the TV to the Wall Mount
Once the TV is mounted, secure it by tightening the screws evenly to avoid damaging the screen or mount․ Use the provided hardware, such as bolts and washers, to ensure a firm connection․ Double-check that all cables are properly connected and routed․ Test the TV’s stability by gently rocking it side to side․ If using a swivel or tilting mount, adjust the TV to your desired position before final tightening․ Ensure the mount is level and the TV is evenly balanced for optimal viewing․
6․3 Testing the Stability
After securing the TV, test its stability by gently rocking it from side to side and checking for any wobbling or movement․ Use a level to ensure the TV remains perfectly horizontal․ Verify that all screws and bolts are tightly secured without over-tightening․ Ensure the mount is firmly attached to the wall studs and the TV is evenly balanced․ If the TV feels unstable, adjust the mount or tighten the connections as needed to achieve a solid, wobble-free installation․
6․4 Adjusting the TV for Optimal Viewing
Once the TV is securely mounted, adjust its position for optimal viewing․ Ensure the screen is at eye level when seated to avoid neck strain․ Use the mount’s tilt, swivel, or rotational features to achieve the best viewing angle․ Fine-tune the TV’s alignment to ensure it’s level and properly centered․ If using a swiveling mount, adjust the TV’s orientation to minimize glare from light sources․ Finally, double-check all adjustments to ensure a comfortable and visually pleasing setup․
Final Checks and Adjustments
Ensure the TV is level, all connections are secure, and the mount is stable․ Double-check the alignment and tighten any loose screws․ Perform a final visual inspection to confirm everything is properly installed and functioning as intended․
7․1 Ensuring Everything is Level
Use a bubble level to ensure the TV mount and screen are perfectly horizontal․ Place the level on the mounting plate and adjust as needed․ Double-check the TV’s position to confirm it’s straight and aligned properly․ If the mount allows, make fine adjustments to the tilt or swivel․ Tighten all screws firmly but avoid over-tightening․ Verify the level from multiple angles to ensure accuracy and stability, preventing any wobbling or uneven display․
7․2 Checking All Connections
After mounting, verify all connections to ensure they are secure and properly aligned․ Check the screws on the mounting plate and bracket for tightness, but avoid over-tightening․ Use a level to confirm the TV is straight and evenly positioned․ Ensure all cables are neatly organized and connected to the correct ports․ Test the TV’s stability by gently rocking it side to side․ If any movement occurs, tighten the connections or adjust the mount as needed for a stable setup․
7․3 Final Inspection
Conduct a thorough visual inspection to ensure the TV is perfectly aligned and level․ Check for any gaps or misalignments between the TV and the wall mount․ Verify that all screws and bolts are securely tightened but not over-tightened․ Ensure the TV is stable and does not wobble․ Test the TV’s position by gently rocking it to confirm it is firmly attached․ Finally, inspect the cables and connections to ensure they are neatly organized and properly secured․
Common Mistakes to Avoid
Avoid incorrect VESA measurements, over-tightening screws, and ignoring weight limits․ Ensure proper leveling and secure all connections to prevent instability and damage to your TV or wall mount․
8․1 Incorrect VESA Measurements
Incorrect VESA measurements are a common mistake that can lead to poor fitment or instability․ Always verify the VESA standard of your TV, expressed in millimeters, to ensure compatibility with the mount․ Mismatched VESA patterns can result in a loose connection or inability to secure the TV properly․ Double-check the mounting holes on the back of your TV and compare them with the mount’s specifications․ Using a template or measuring guide can help avoid errors during installation․
8․2 Over-Tightening Screws
Over-tightening screws is a common mistake that can damage the TV or the mount․ Always use the hardware provided with the mount, as other screws may not fit properly․ Tighten screws firmly but avoid excessive force, which can strip threads or crack the TV’s mounting points․ If unsure, refer to the mount’s manual for torque specifications․ Over-tightening can also misalign the TV, so check the mount’s level after securing the screws․ Proper tightening ensures stability and prevents potential damage․
8․3 Ignoring Weight Limits
Ignoring weight limits is a critical mistake that can lead to the collapse of the mount or damage to the TV․ Always check the weight capacity specified by the manufacturer and ensure your TV does not exceed it․ Exceeding the limit can cause the mount to fail, risking costly repairs or safety hazards․ Use appropriate hardware for heavy TVs, such as studs for solid walls or toggle bolts for hollow walls, to ensure stability and prevent accidents․
Safety Tips
Always turn off power to the wall before drilling and use proper hardware to avoid damaging the TV or wall․ Ensure the mount is stable to prevent the TV from tipping or falling, and never exceed weight limits for safe installation․
9․1 Turning Off Power
Before starting the installation, ensure all power to the wall is turned off to avoid electrical hazards․ Locate the circuit breaker or switch controlling the wall outlets and switch it off․ Verify there’s no power using a voltage tester․ This step is crucial to prevent accidental electrical shocks or damage to wiring․ Always prioritize safety when working with drills or power tools near electrical systems; If unsure, consult a licensed electrician to ensure proper precautions are taken․
9․2 Using Proper Hardware
Using the correct hardware is essential for a safe and secure TV installation․ Ensure all screws, bolts, and mounts are specifically designed for your TV’s weight and VESA standards․ Avoid using generic or incorrect hardware, as it may damage the TV or compromise stability․ Toggle bolts are recommended for hollow walls, while stud-mounted installations require lag screws․ Always follow the manufacturer’s guidelines for hardware usage to prevent damage or instability during installation․
9․3 Ensuring Stability
Ensuring stability is crucial for a safe and secure TV installation․ Always use a level to confirm the mount is perfectly horizontal and vertical․ Test the TV’s weight by gently rocking it to ensure the mount holds firm․ Double-check all connections and hardware for tightness․ For added stability, consider having a second person assist during installation․ Properly tightened screws and secure brackets will prevent wobbling or shifting, ensuring your TV remains stable and safely mounted on the wall․
Troubleshooting Common Issues
Identify and resolve common issues like uneven alignment, loose hardware, or wobbling․ Ensure stability by tightening screws and checking connections․ Addressing these promptly prevents damage and ensures safety․
10․1 TV Not Level
If your TV appears uneven, use a bubble level to check alignment․ Loosen the mounting bracket screws slightly, adjust the TV to ensure it’s straight, and tighten the screws again․ For minor adjustments, some mounts allow fine-tuning without removing the TV․ Double-check the level after each adjustment to ensure stability․ For heavy TVs, ensure the mount is securely attached to wall studs to prevent wobbling and maintain a level position over time․
10․2 Mounting Hardware Issues
Hardware issues can arise if screws are overtightened or if incorrect bolts are used․ Always use the hardware provided with the mount to avoid damaging the TV or wall․ If screws feel loose, tighten them gently without over-tightening․ Check for any stripped screws or misaligned brackets․ If a screw strip occurs, consider using wall anchors or consulting a professional․ Ensure all bolts are securely fastened to maintain stability and prevent wobbling or potential damage to the TV or mount․
10․3 TV Wobbling
TV wobbling can occur due to improper installation or loose screws․ Check if the mount is evenly aligned and all screws are tightened securely․ Ensure the weight of the TV does not exceed the mount’s capacity․ If the issue persists, verify that the wall studs are properly secured and the mount is level․ For persistent wobbling, consider consulting a professional to ensure stability and safety․ Always follow the manufacturer’s guidelines for secure installation․
Optional Considerations
Consider hiding cables for a sleek look, mounting above a fireplace for unique placement, or addressing special wall types like brick or concrete for a sturdy setup․
11․1 Hiding Cables
Hiding cables enhances the aesthetic appeal of your TV setup․ Consider using in-wall power extensions or cable management systems to conceal wires behind the wall․ For a cleaner look, install cables through raceway kits or use cable boxes․ These methods ensure a sleek, professional appearance without compromising functionality․ If you’re not comfortable with in-wall installations, simpler solutions like cable ties or adhesive cable organizers can also keep your setup tidy and organized․
11․2 Mounting Above a Fireplace
Mounting your TV above a fireplace can be a stylish choice, but it requires careful planning․ Ensure the fireplace emits minimal heat to avoid damaging the TV․ Use a full-motion mount for optimal angle adjustments․ Consider the viewing height and angle to consider the room’s seating arrangement․ If possible, choose a fireplace with lower heat output, like a gas or gel model․ Always check the manufacturer’s guidelines for heat tolerance and ensure proper ventilation to maintain your TV’s performance and longevity․
11․3 Special Wall Types
For special wall types like brick, concrete, or hollow walls without studs, use anchor bolts or toggle bolts for secure installation․ Brick and concrete require drill bits and anchor bolts to ensure stability․ Hollow walls need toggle bolts to distribute weight evenly․ Always check weight limits and ensure the mount is rated for your TV’s size and weight․ If unsure, consult a professional to avoid damage or safety risks, especially for heavy TVs or complex wall structures․
With your TV successfully mounted, you’ve enhanced your space and viewing experience․ Proper tools and techniques ensure a secure setup․ Always follow safety guidelines and VESA standards for optimal results․ Mounting your TV is a cost-effective, rewarding DIY project․ Take pride in your handiwork and enjoy the sleek, modern look it brings to your home․